Automating vulnerability reports with Microsoft Defender - Part 1
In this two-part series we'll create an app that sends automated vulnerability reports directly to your users via the Microsoft Defender for Endpoint APIs...
Warning: this post has not been updated since 2022, and is likely outdated. Please refer to Microsoft’s documentation for more up-to-date information.
Introduction
Microsoft Defender for Endpoint has built-in functionality that allows you to configure email notifications that alert your security team when vulnerable software is detected on your users’ devices. You can configure these rules based on the severity of the vulnerability, what groups the device belongs to, and even have it notify you when a public exploit is released following the initial disclosure. This is great, but there are cases where you may need more control over the reporting process.
Consider a small business that doesn’t have a dedicated security team. Security is an increasing concern for the company while everyone is working from home, so they’ve just made an investment in EDR, but everyone still has local administrator rights on their laptops and users have historically been allowed to install anything they want (within reason). The two-man IT team simply doesn’t have the bandwidth to keep track of the plethora of updates and advisories that get released every week, let alone manually review the impacted devices and devise a mitigation strategy for each new vulnerability.
Wouldn’t it be great if there was a way to offload some of that work from the IT team and automatically provide end-users with actionable recommendations to remediate their devices after every Patch Tuesday?
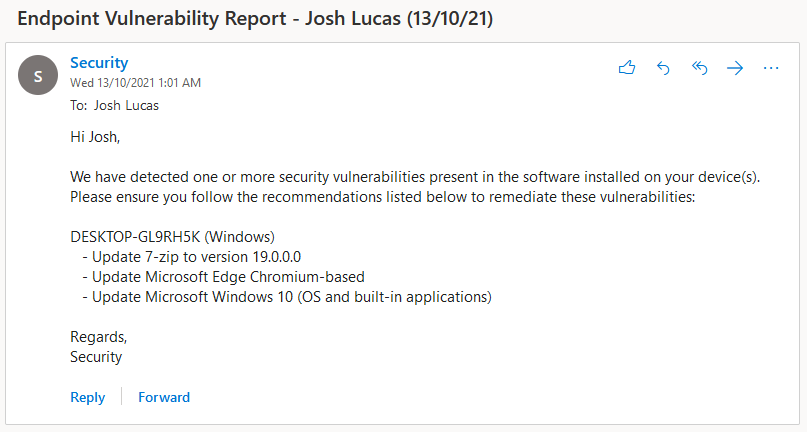
In this two-part series we’re going to create an app that does just that. We’ll register an app in Azure AD, write a PowerShell script that creates automated vulnerability reports using the Microsoft Defender for Endpoint APIs, and deploy the script to Azure Automation for production. Here’s a sneak peek at the final result:
Brainstorming the script
In short, we want to create a script that will:
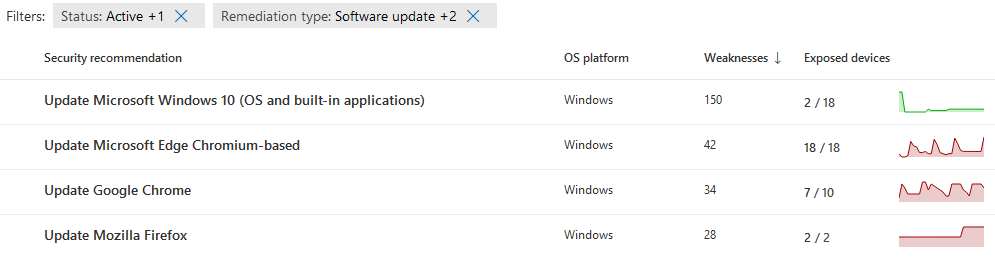
- Get a list of devices and their associated software recommendations from the Microsoft Defender for Endpoint API (e.g. ‘Update Google Chrome’)
- Enrich the list of devices with user information from the Microsoft Graph API (e.g. name, email address, etc)
- Group the list of devices by user
- Send an email to each user detailing the security recommendations they need to action on each of their devices
For the sake of this post I’m assuming you have both enabled the Microsoft Defender for Endpoint integration with Intune and onboarded your devices to Microsoft Defender for Endpoint using Intune. This is required to correlate the device in Microsoft Defender for Endpoint with the device object in Azure AD, which we’ll use later to determine who owns the device so we know who to notify.
Creating the app registration
In order for our script to do anything, we’ll first need to create an app registration for it in Azure AD and grant the app permissions to query the appropriate Microsoft APIs. App registrations are used to uniquely identify your app and establish a trust relationship with the Microsoft identity platform. I won’t go into much more detail regarding app registrations or how they work here, but one key concept you’ll need to understand is the difference between delegated permissions and application permissions. Essentially, delegated permissions are used for apps that act on behalf of a signed-in user (e.g. an event booking app that needs access to read and update your calendar), whereas application permissions are used by apps that operate as a background service or daemon. Since we want our script to run on a recurring schedule independently of any user context, we’ll be using application permissions in this case.
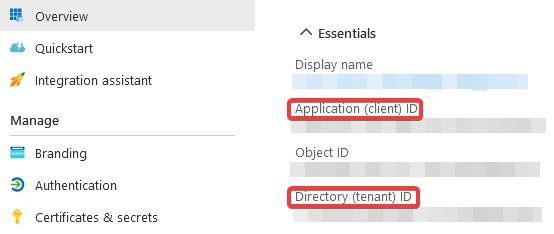
Go ahead and follow the initial instructions in Microsoft’s documentation to create an app to access Microsoft Defender for Endpoint without a user, making sure you give it a meaningful name for future reference. Once you’ve registered the app, note down the application (client) ID and directory (tenant) ID in the Overview page as we’ll need this to authenticate our script later:
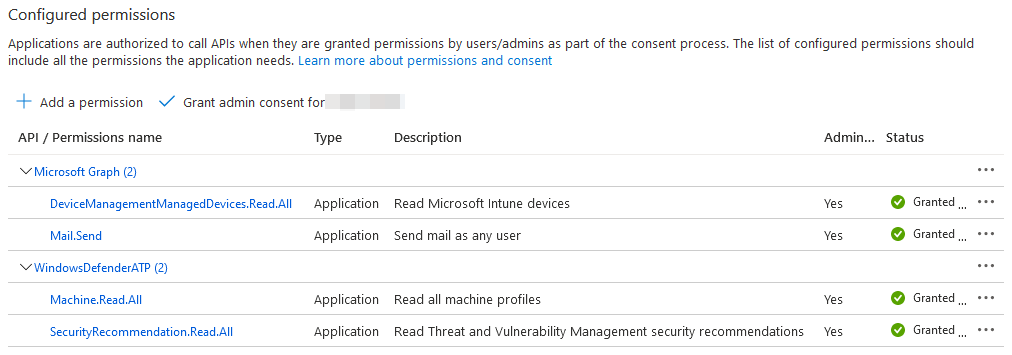
Our app needs permissions to access two separate APIs; the Microsoft Defender for Endpoint API (to query the list of vulnerable devices and their associated software recommendations) and the Microsoft Graph API (to determine device ownership and send notification emails). As such, you’ll need to grant the following API permissions to your app registration:
Microsoft Graph
- DeviceManagementManagedDevices.Read.All
- Mail.Send
WindowsDefenderATP
- Machine.Read.All
- SecurityRecommendation.Read.All
Once you’ve selected the appropriate permissions for both APIs, click the button that says ‘Grant admin consent for
Lastly, create a client secret in the Certificates & secrets page and store the value somewhere safe. You’ll need this to authenticate the script alongside the application and tenant ID later.

An astute reader may have noticed that by granting our app registration the Mail.Send application permission, we’ve inadvertently given it access to send mail on behalf of every mailbox in our tenant, rather than just a specific shared mailbox. That’s obviously a huge security risk - we don’t want our app being able to impersonate the CEO for example.
Thankfully, we have the ability to restrict application permissions to Exchange Online mailboxes using application access policies, which we’ll cover in the next section.
Scoping mailbox permissions
So, to recap - we’ve created an app registration for our script in Azure AD and granted it the appropriate permissions to query the various Microsoft APIs. We now need to scope the dangerous Mail.Send application permission so that our app can only send mail from a specific shared mailbox managed by the IT team. To do this we’ll need to create an application access policy in Exchange Online.
Complicating things a bit, Microsoft’s documentation for the -PolicyScopeGroupID parameter explains that you can only scope an application access policy to security principals, which excludes shared mailboxes:
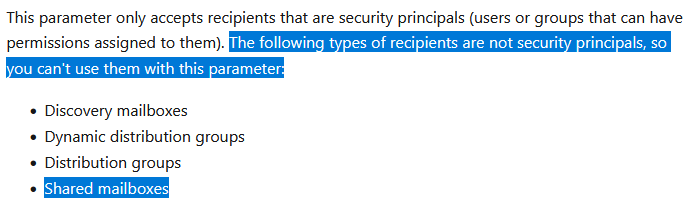
However, while you can’t directly scope an application access policy to a shared mailbox, you can add the mailbox to a mail-enabled security group and scope the policy that way. We’ll use this as a workaround.
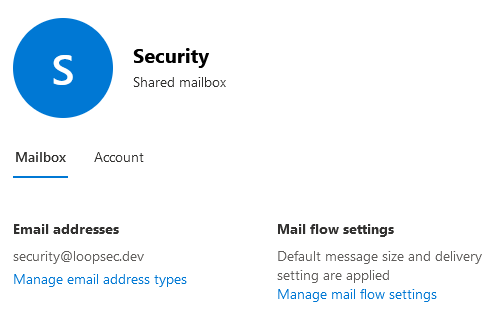
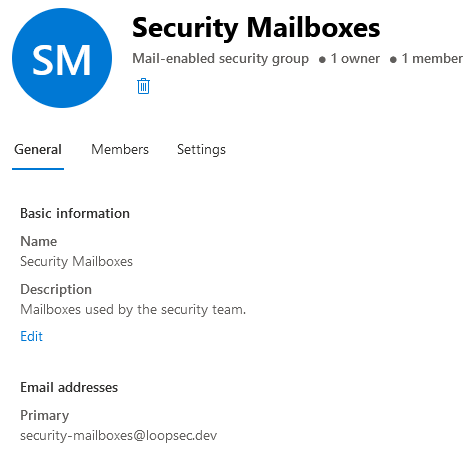
As you can see, I’ve created a shared mailbox called security@loopsec.dev, and added it as a member of a mail-enabled security group, security-mailboxes@loopsec.dev:
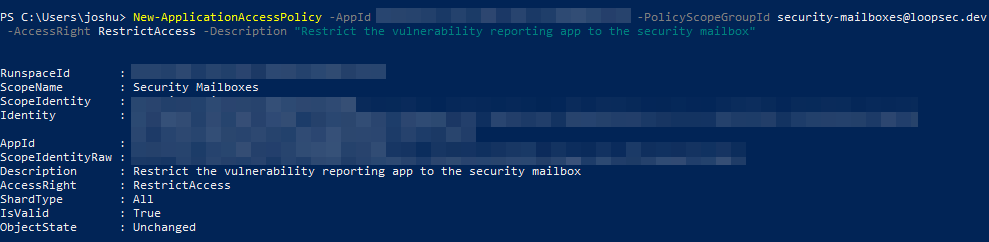
Next, connect to Exchange Online PowerShell and run the New-ApplicationAccessPolicy cmdlet to create a policy that restricts your app to only sending mail on behalf of the members of the new mail-enabled security group (i.e. the shared mailbox).
1
2
New-ApplicationAccessPolicy -AppId <app_id> -PolicyScopeGroupId <security_group_mailbox> -AccessRight RestrictAccess `
-Description "Restrict the vulnerability reporting app to the security mailbox"
Here’s an example of the output when I ran the command in my tenant:
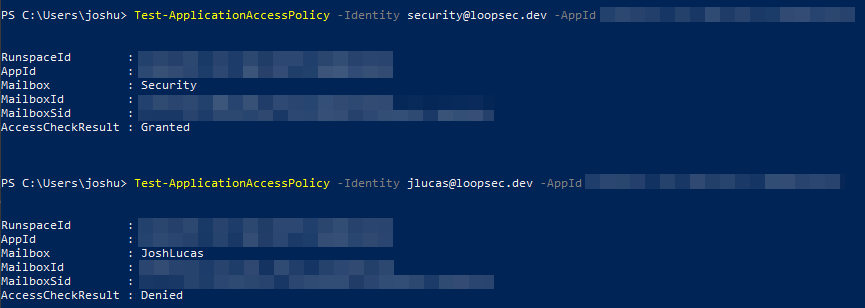
You can also use the Test-ApplicationAccessPolicy cmdlet to sanity-check the policy.
1
Test-ApplicationAccessPolicy -Identity <shared_mailbox> -AppId <app_id>
Here’s an example where I confirm that my app can send mail on behalf of the shared mailbox, but not my user account:
That’s a wrap for Part 1! We’ve finally covered everything we need to get started on the exciting stuff.
In Part 2 we’ll learn about the OAuth 2.0 client credentials flow, write a PowerShell script to automate the process of querying the Microsoft APIs and sending vulnerability reports to end-users, and deploy the result to Azure Automation for production.