Just-in-time conditional access with Azure AD Privileged Identity Management
In this post we'll explore using privileged access groups to implement time-based conditional access policy exclusions and impose app enforced restrictions in SharePoint and Exchange Online...
Warning: this post has not been updated since 2022, and is likely outdated. Please refer to Microsoft’s documentation for more up-to-date information.
Introduction
Microsoft curate a list of common conditional access policies that align with their best-practice recommendations for securing Azure Active Directory, including requiring multi-factor authentication for all users and blocking legacy authentication protocols, just to name a few. These policies are great, but in practise they can be difficult to implement. One of the challenges that many organisations face is the ability to handle exclusions in a manner that is compliant with their regulatory requirements, such as the need to audit all exemptions, ensure they go through a proper approval process and enforce compensating controls.

Consider a business that has configured a conditional access policy to require users login from compliant work-managed devices in order to access company resources. In the event their laptop breaks, employees need to be able to request temporary exemptions to this policy so that they can continue to work from a personal device while a replacement laptop is prepared. Exemptions need to be auditable, time-based and explicitly approved by management, and IT needs to enforce technical restrictions that prevent the user from downloading company documents to their personal device in the interim. Unfortunately, conditional access policy exclusions currently lack any significant auditing functionality, cannot facilitate expirations and are difficult to manage at scale. How can we meet these business requirements while minimising the administrative overhead on our IT team?
Our answer lies with Azure AD Privileged Identity Management. To explore this scenario, we’ll develop a process in which users can temporarily elevate to membership of a privileged access group that is excluded from the compliant device requirement, and instead imposes app enforced controls in SharePoint, OneDrive and Exchange Online to restrict their ability to download company documents for the duration of the exemption.
Creating the privileged access group
Privileged Identity Management (PIM) is a service that enables you to manage, control, and monitor access to important Azure AD roles, Azure RBAC roles and privileged access groups in order to mitigate the risk of permanently assigning users excessive or unnecessary permissions. We’re specifically interested in privileged access groups, which are typically used to allow the activation of multiple role assignments in a single request - for example, an auditor who needs to activate the Global Reader role in Azure AD and the Reader role in many different Azure subscriptions. Rather activate each role individually, they can elevate to membership of a privileged access group that has been assigned the required permissions.
In our case, we’re going to create a privileged access group for all users who are exempt to the compliant device requirement (and should therefore have limited, browser-only access to company documents) by adding it as an exclusion/inclusion to the respective conditional access policies.
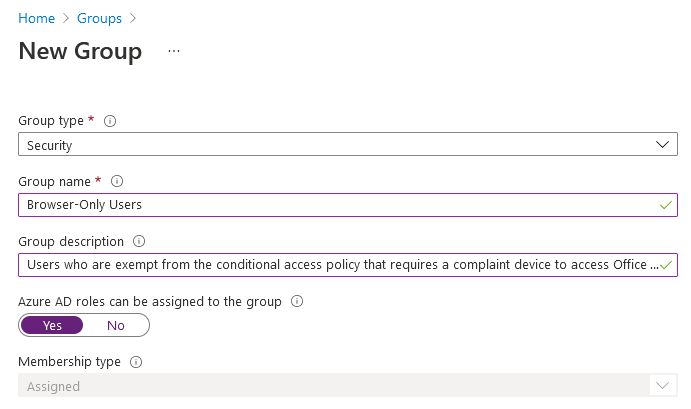
Step one is to navigate to the Azure Portal and create a role-assignable security group for our browser-only users. While we won’t actually be assigning any roles to this group, it must be role-assignable in order to subsequently enable it as a privileged access group:
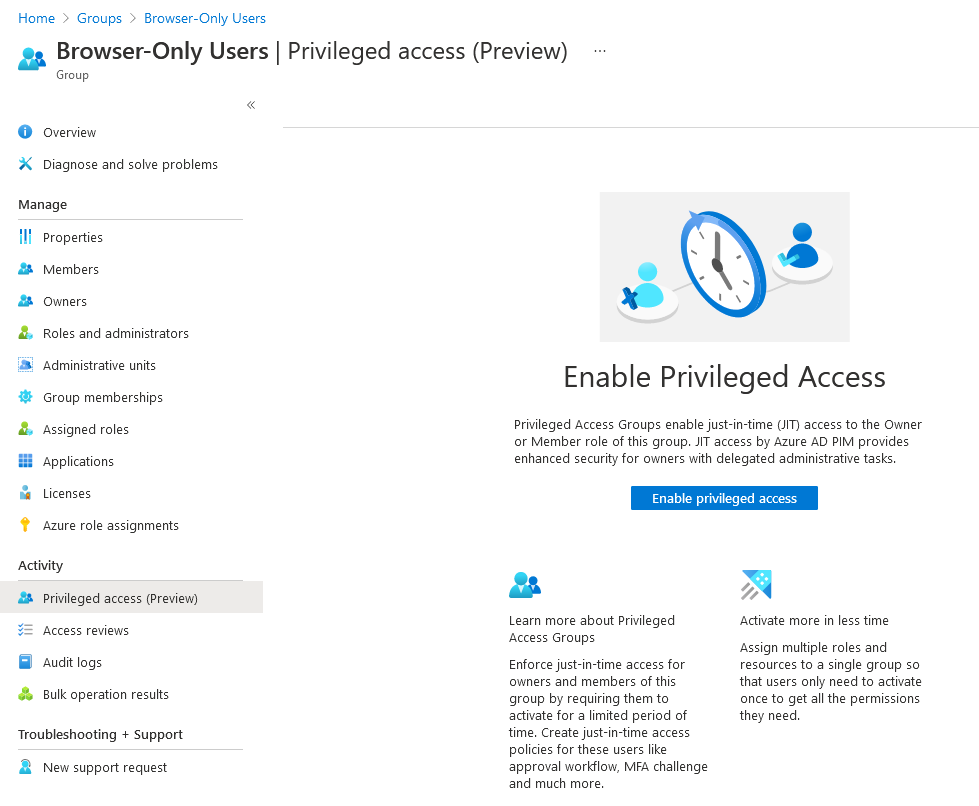
Next, open the group and enable it for privileged access:
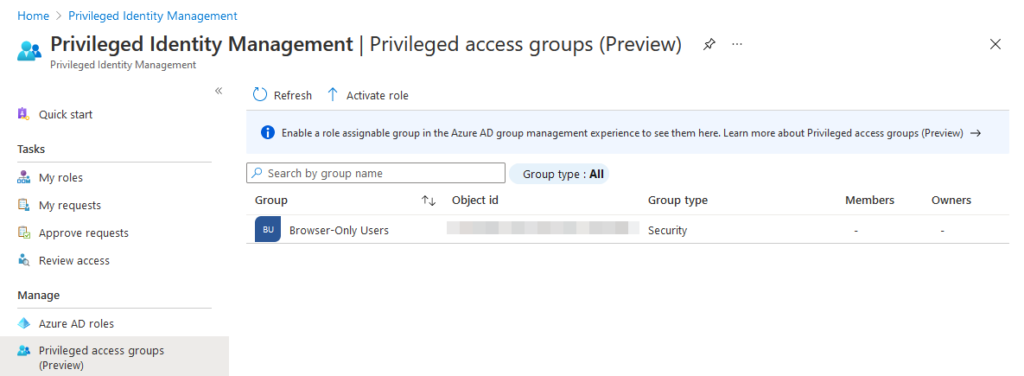
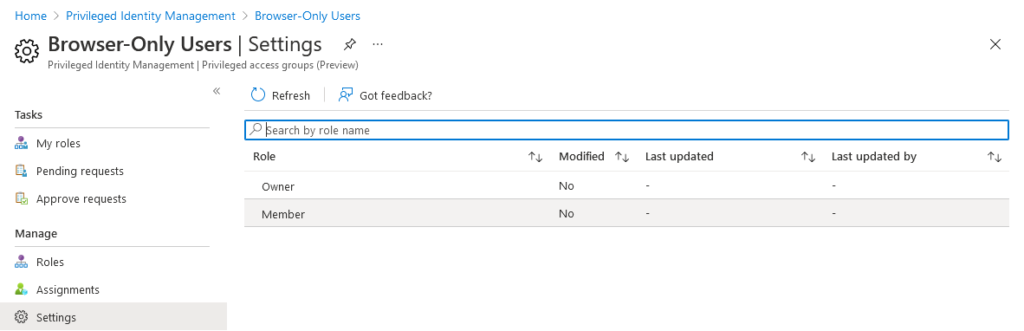
Once privileged access group has been enabled, it will show up in the Privileged Identity Management console:
Click the newly-enabled group and navigate to the Settings page. Privileged access group allow you to configure two roles for activation - Owner and Member. We’re specifically interested in the Member role, since group membership is how Azure AD will determine which conditional access policies to apply to our users during sign-in, so select that role for now.
Before we configure the Member role, we need to understand the difference between an eligible and an active role assignment. Essentially, an eligible role assignment is one that requires a user to perform an action before they can actually use the role (e.g. go through an approval process), whereas having an active role assignment means the user has those privileges enabled for use. Refer to Microsoft’s terminology page for more details if you’re unsure.
In our case we’re going to allow both eligible and active role assignments, since we might need to use both depending on the circumstance. Click the Member role and configure it per the settings below:


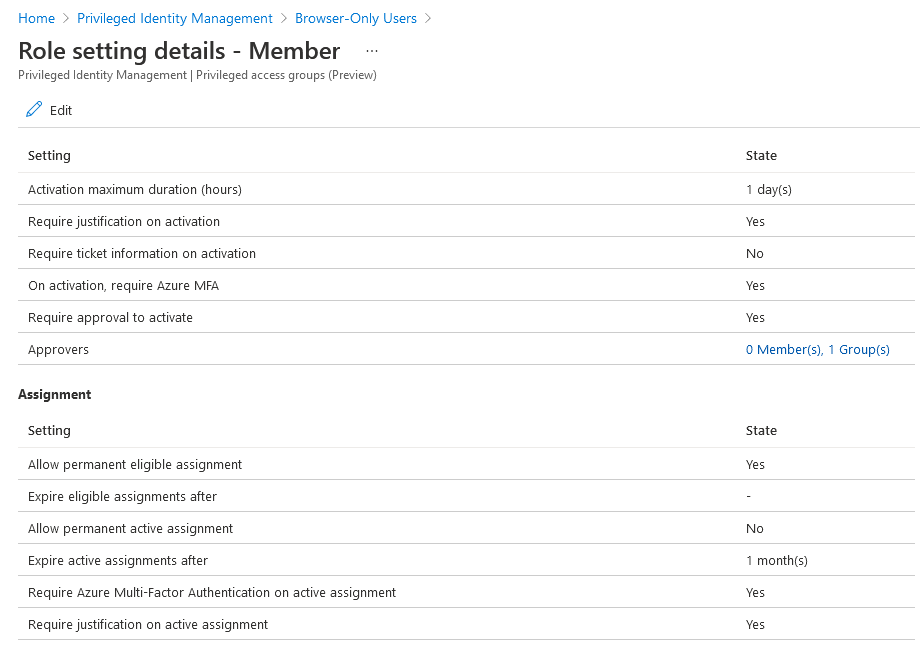
I’ve configured my role to require eligible users perform multi-factor authentication, provide a business justification and have the request approved by an administrator upon activation of the Member role. Permanent eligible assignments are allowed, since we always want the role available to internal users for activation, but I’m also allowing temporary active assignments in case administrators need to assign long-term exemptions (eligible role assignments can only be activated for up to 24 hours at a time, though they can be extended or renewed). I’ve left the default notification settings as-is.
Once configured, your Member role settings should look something like this:
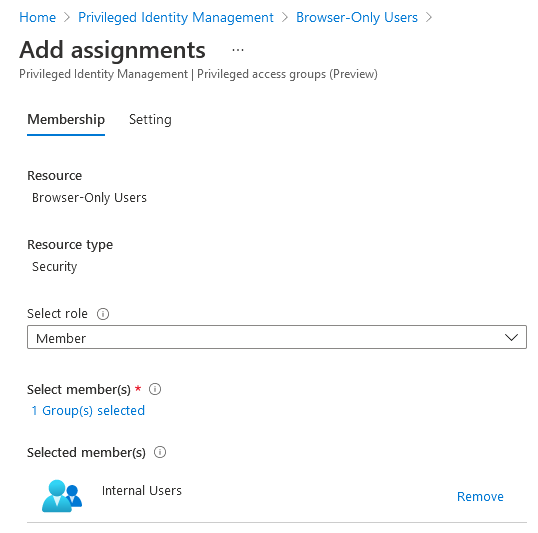
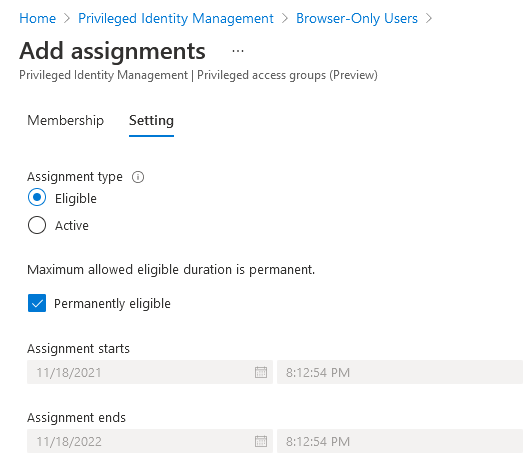
Our last step is to add an eligible role assignment to the privileged access group for our internal users. I’ve created a dynamic security group using the (user.userType -eq “Member”) membership rule for this purpose, but any applicable group will do. Navigate to the Assignments page and add an eligible role assignment as follows:
Configuring the conditional access policies
Now that we’ve set up the privileged access group, we need to configure our conditional access policies so that the group is excluded from the compliant device requirement, and create a new policy that imposes app enforced restrictions on when they access company documents in SharePoint, OneDrive and Exchange Online. Here’s a snapshot of my existing conditional access policy as an example:
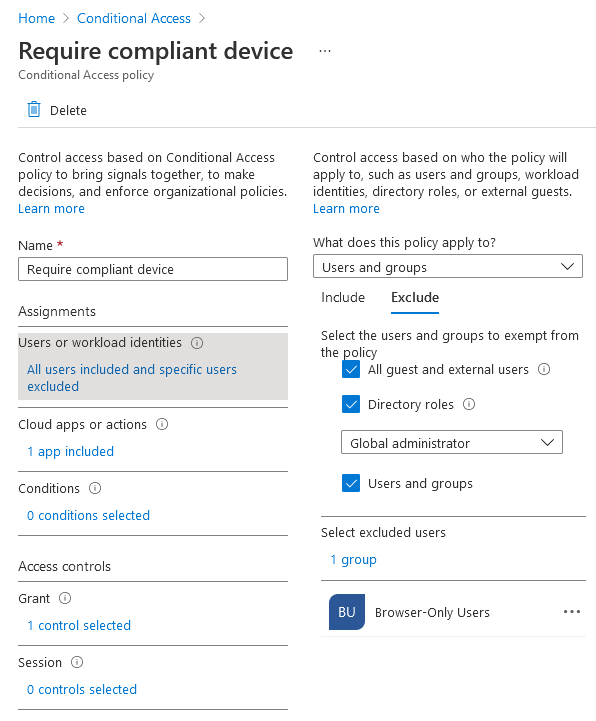
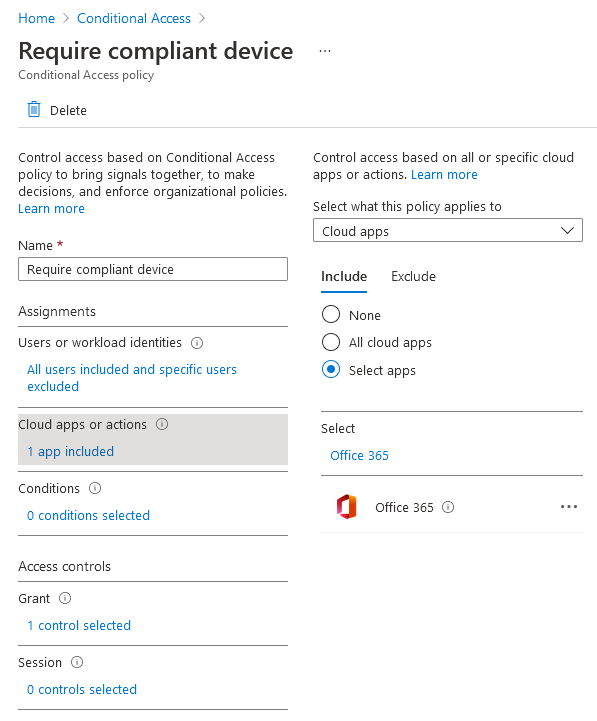
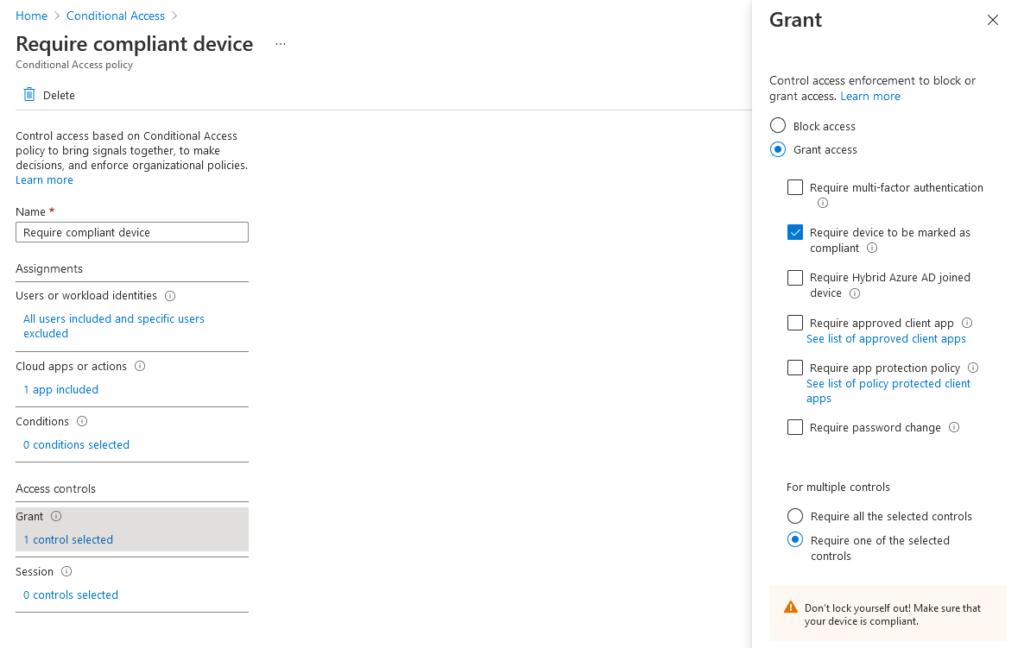
I’ve updated the policy so that it targets all users accessing Office 365 (excluding external users, Global Administrators and most importantly, members of the ‘Browser-Only Users’ group) and only grants access if their device is marked as compliant in Microsoft Endpoint Manager. Next, we need to create a new conditional access policy that limits exempted users’ access to Office 365 from a browser only and restricts their ability to download company documents from SharePoint, OneDrive and Exchange Online using app enforced restrictions.
Application enforced restrictions are a session control that allows conditional access policies to pass device information to selected cloud apps, which lets us restrict certain actions (e.g. the ability to download documents, or even access the resource at all) from unmanaged devices. Currently, only SharePoint Online (which includes OneDrive for Business, which is built upon SharePoint) and Exchange Online support this session control. We’ll start with Exchange Online first.
In order to implement app enforced restrictions in Exchange Online, we need to update the ConditionalAccessPolicy setting in our Outlook Web App mailbox policy. This setting has the following values:
- Off: No conditional access policy is applied to Outlook on the web. This is the default value.
- ReadOnly: Users can’t download attachments to their local computer, and can’t enable Offline Mode on non-compliant computers. They can still view attachments in the browser.
- ReadOnlyPlusAttachmentsBlocked: All restrictions from ReadOnly apply, but users can’t view attachments in the browser.
Connect to Exchange Online PowerShell and run the Get-OwaMailboxPolicy cmdlet to view your existing policies - if you haven’t created any custom ones, the default policy is called ‘OwaMailboxPolicy-Default’:
1
Get-OwaMailboxPolicy | Select-Object Identity,ConditionalAccess*

Use the Set-OwaMailboxPolicy cmdlet to update your mailbox policy with the desired ConditionalAccessPolicy setting. In my case I’m using the ReadOnly value since I still want users to be able to view attachments in the Outlook Web App, just not download them:
1
Set-OwaMailBoxPolicy -Identity <mailbox_policy> -ConditionalAccessPolicy <value>

That’s it for Exchange Online. In order to implement app enforced restrictions in SharePoint Online, navigate to your tenant’s SharePoint admin center and select Policies → Access control → Unmanaged devices. You will be prompted to select one of the following choices:
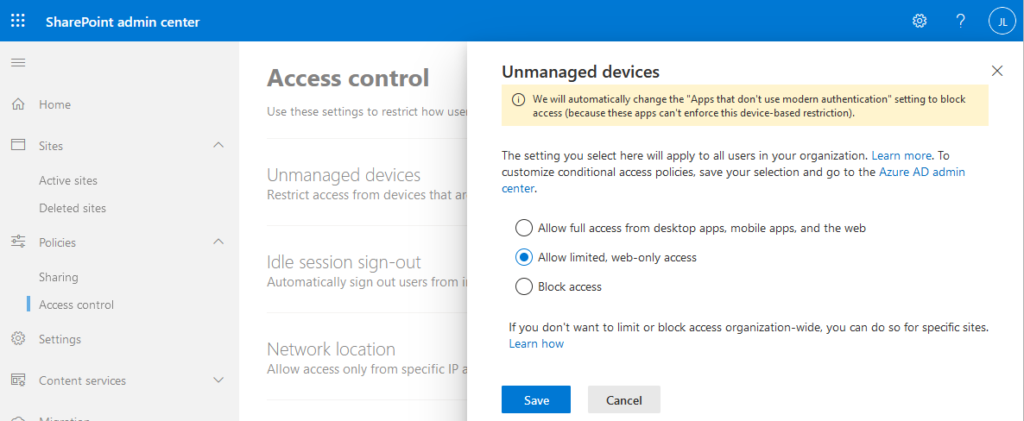
We’re going to chose ‘Allow limited, web-only access’ since it’s perfect for our use case. Note that these settings are global and will apply to all SharePoint sites in your tenant, but you can block or limit access to a specific SharePoint site or OneDrive account if you wish. There are also a handful of advanced configurations you can apply using PowerShell, such as the option to allow users to download files that can’t be previewed, such as ZIP archives and executables.
Warning
Clicking ‘Save’ will immediately create two new conditional access policies targeting all users that only allows access to SharePoint from compliant devices, and enforces limited browser-only access from unmanaged devices.
When you’re ready, save the setting and head on back to the Conditional Access console in the Azure Portal. You’ll notice SharePoint will have created two new conditional access policies for you without much warning:
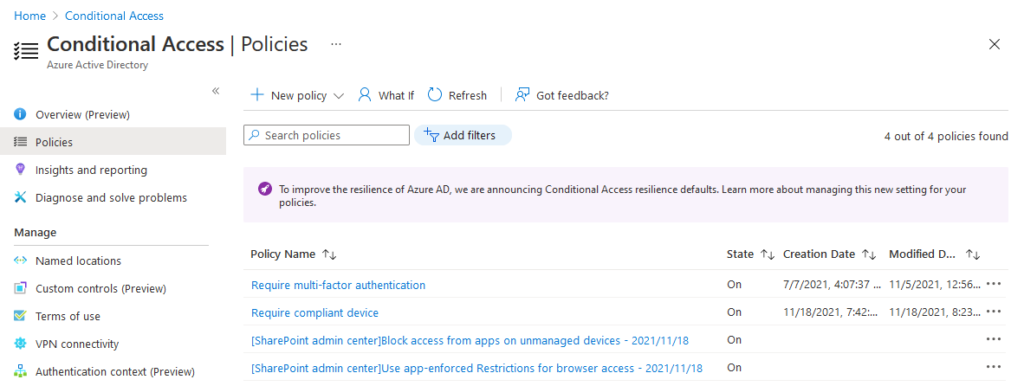
I’d recommend disabling these policies immediately, since we’ll be using our own. Create a new conditional access policy configured as follows:
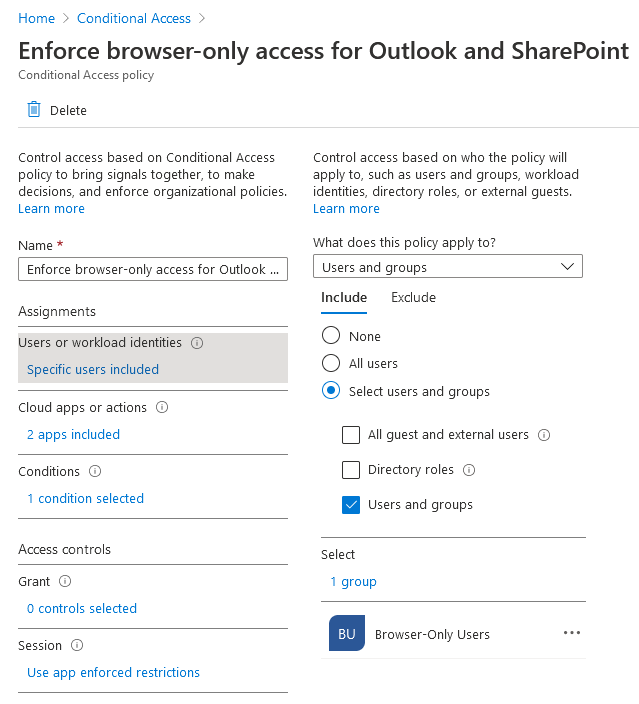
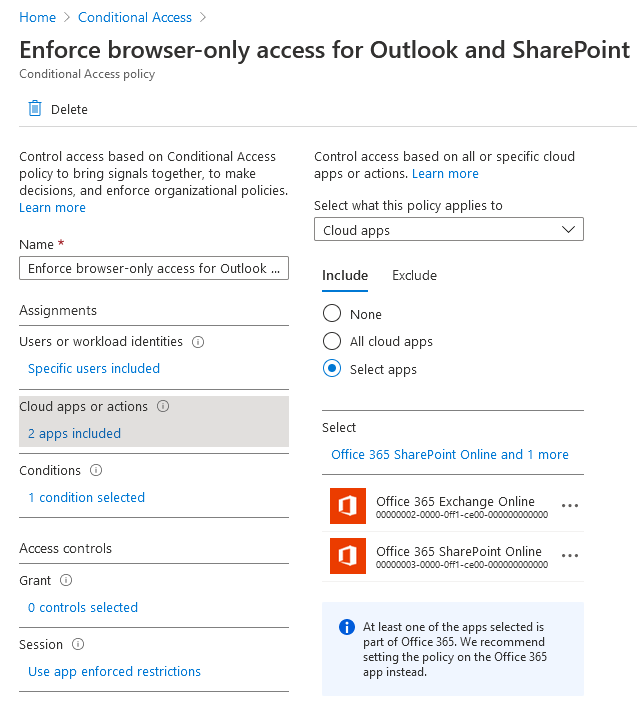
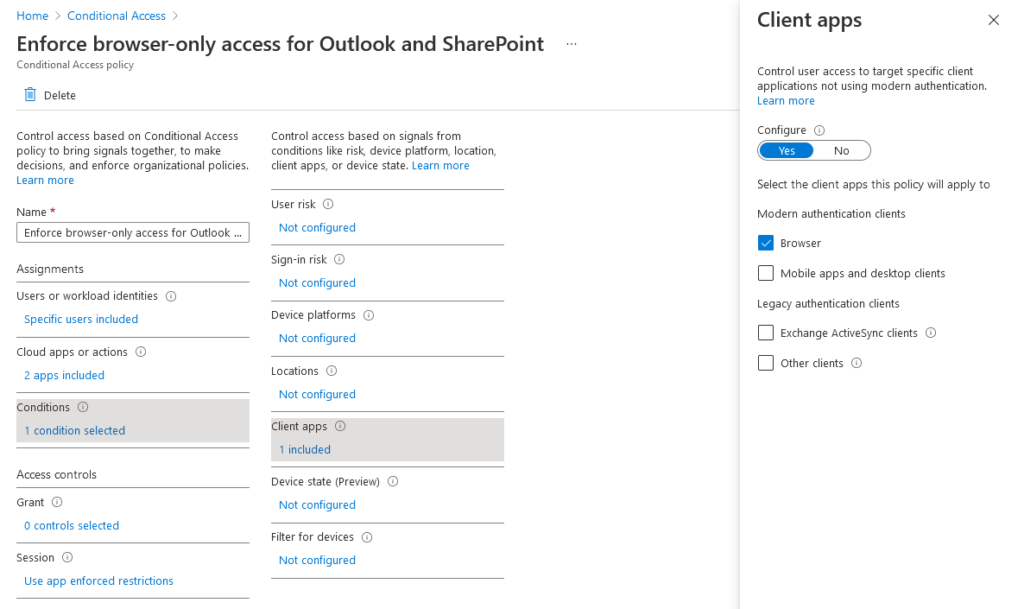
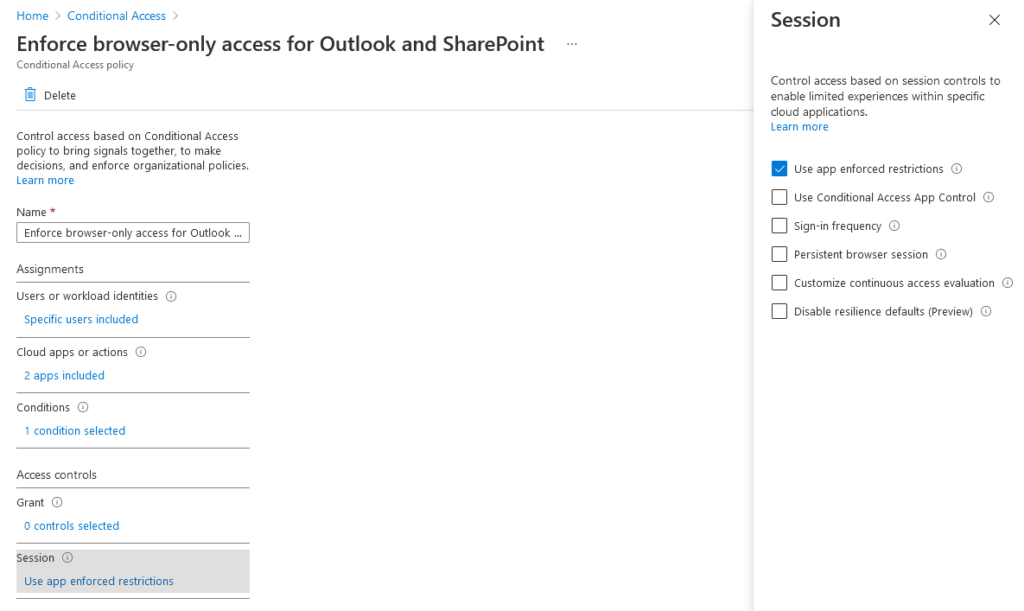
In summary, this conditional access policy targets members of the ‘Browser-Only Users’ group accessing Exchange Online and SharePoint, only grants access if the sign-in originates from a browser (rather than a client application like Microsoft Outlook) and imposes our app enforced restrictions so that users can preview company documents, but not download anything. With all that configured, let’s review the user experience.
Reviewing the user experience
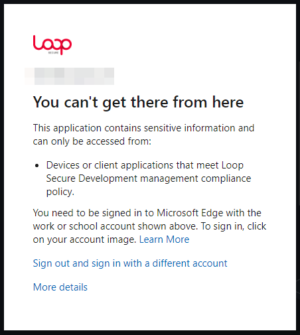
First, our user initially tries to access Office 365 from an unmanaged device but is blocked because their device is not compliant:
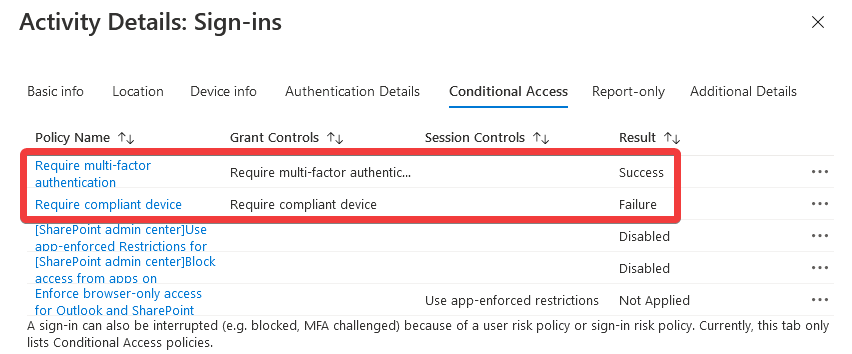
Reviewing the user’s sign-in logs, we can see they are still included in the ‘Require compliant device’ policy, which is expected given the error message:
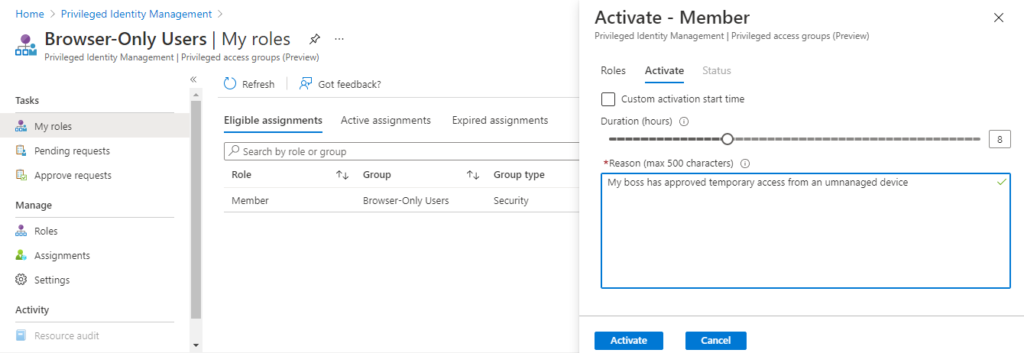
Next, the user is instructed to navigate to the Privileged Identity Management console, select My roles → Privileged access groups → Eligible assignments, and apply to activate the Member role of the ‘Browser-Only Users’ group. The user is prompted to define the duration of their exemption, provide a business justification, and optionally choose a custom activation start time:
Once the user has applied to activate the role, members of the ‘Administrators’ group (or whoever you chose as an approver) will get an email notification asking them to approve or deny the request:
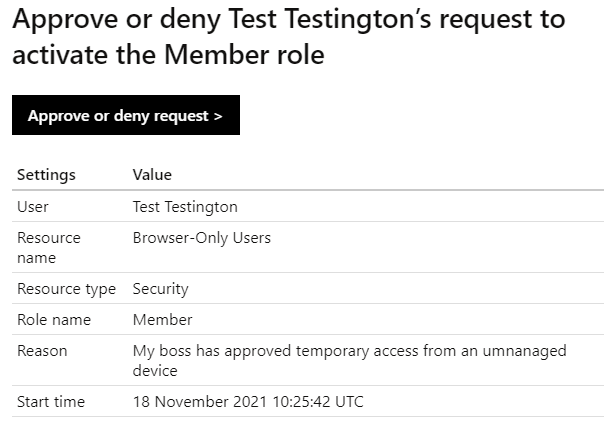
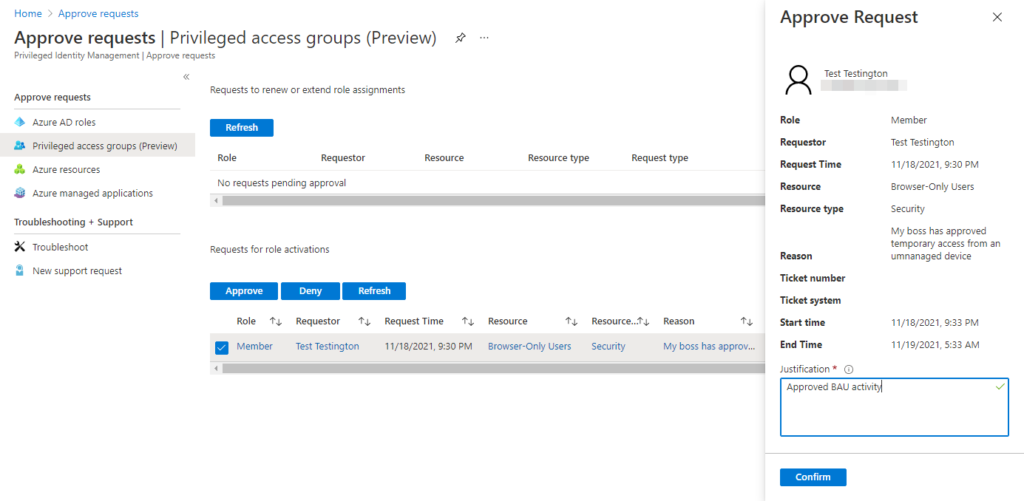
Clicking the ‘Approve or deny request’ link in the email redirects the approver to the Privileged Identity Management console to review the request:
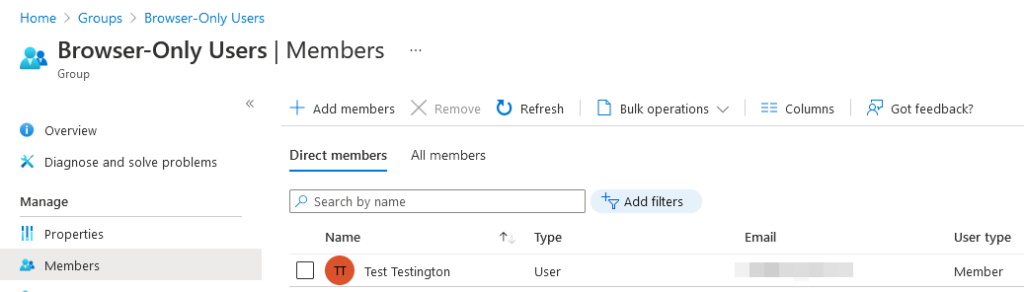
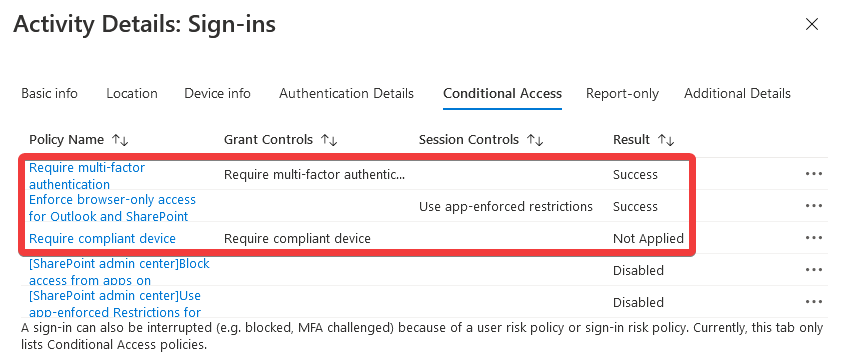
Once approved, the Member role is activated and the user is temporarily added to the ‘Browser-Only Users’ privileged access group. If they try to access Office 365 once more, the sign in will be successful since they are now exempt from the compliant device requirement, and our browser-only app enforced restrictions will instead be applied:
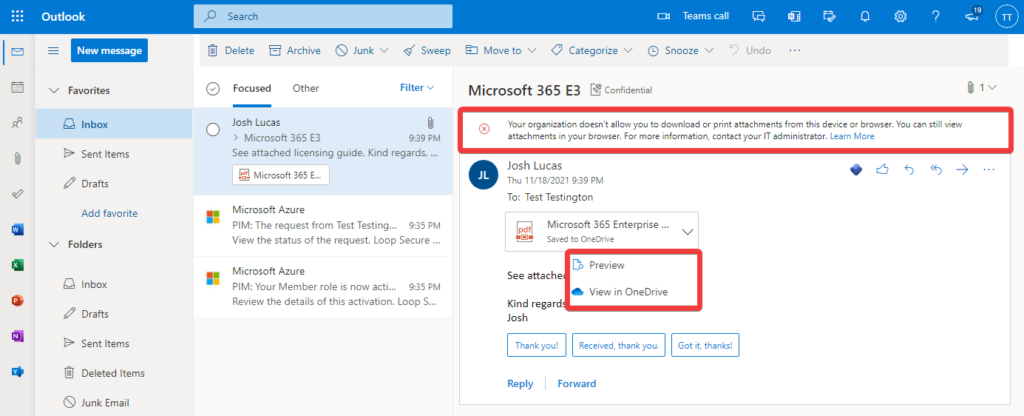
Upon accessing their emails in the Outlook Web App, the user is presented with a banner stating that they are unable to download or print attachments from this device:
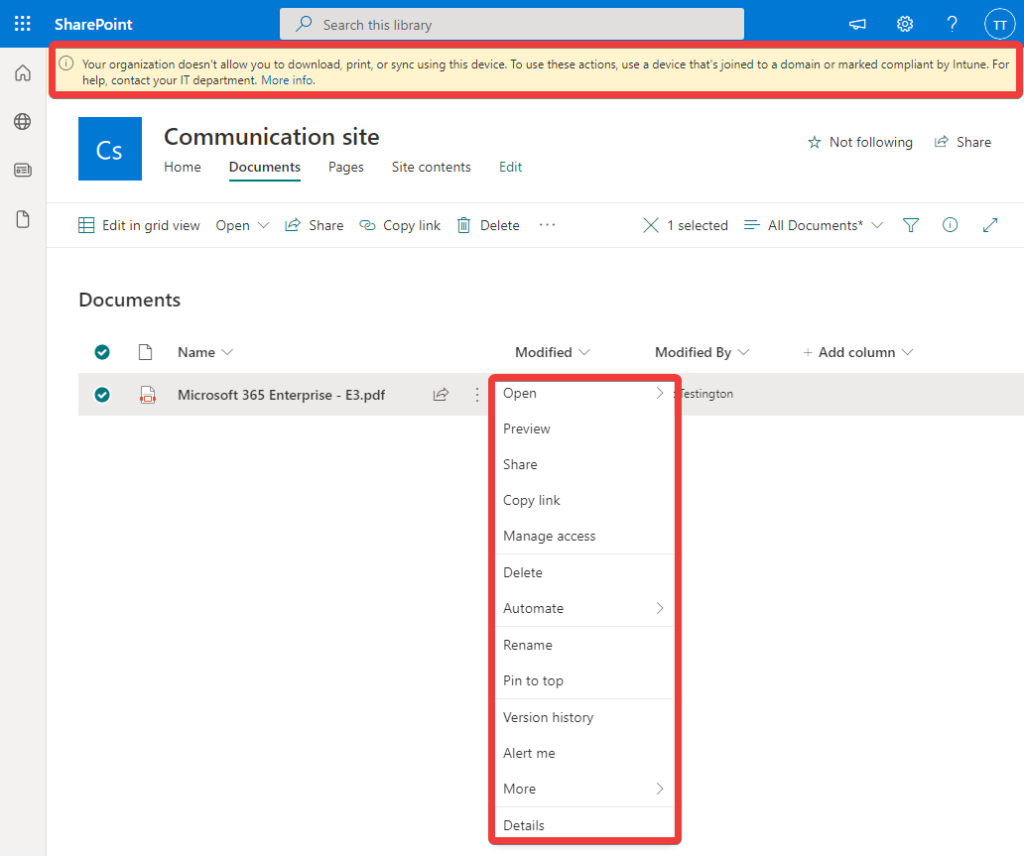
In SharePoint and OneDrive, the user is presented with a similar banner stating that they are unable to download, print or sync company documents and that they can only do so from a compliant, work-managed device:
Conclusion
In this post we explored using privileged access groups to implement time-based conditional access policy exclusions and impose app enforced restrictions in SharePoint and Exchange Online.
Before trying to implement this in a production environment, please be aware that conditional access policies do have some limitations regarding group membership and policy update effective times that may impact its feasibility in larger tenants due to the delay in replication between Azure AD and resource providers like Exchange Online and SharePoint. In practice, I haven’t had any issues in small-medium size tenants (in which the conditional access policies updated almost immediately) but it’s worth testing for yourself regardless.